THE POWER OF PAD REPOSITORY
Introduction
Did you know there’s a way to share your application worldwide for free?
If not, this article might be exactly what you need. Whether you already own an application or are currently developing one, promoting it can be a challenge. That’s where a platform called AppVisor comes in.
AppVisor helps you distribute your app by sharing its details with dozens of software distribution websites that support the PAD (Portable Application Description) repository standard.
👉 You can find a list of supported distribution sites here:
https://www.appvisor.com/partners
Where to Start?
To get started, follow these steps:
1. Own or Build an Application
You’ll need an executable app or installer that you want to share publicly.
2. Host the Application File
Your application must be hosted somewhere with a public direct download link.
Some options:
💡 If using Google Drive, make sure the file is publicly shared and use the link generator above to create a direct download link.
3. Upload a Preview Image
To display a screenshot or logo of your app on listing sites, you’ll also need to host an image publicly.
You can use the same hosting services listed above. Again, make sure the image has a direct image URL (i.e., ends with .png, .jpg, etc.).
Once You Have:
- ✅ A public direct download link for your app
- 🖼️ A direct image link for a preview
You’re ready to proceed to the PAD submission process using AppVisor.
PAD Repository
You can visit the official website of the PAD (Portable Application Description) repository by following the link below:
Official PAD Repository Website
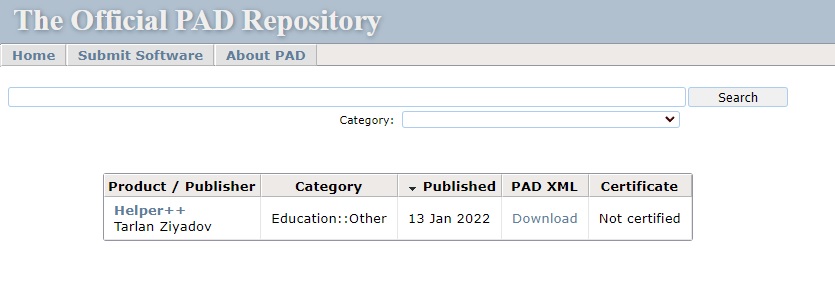
Once you enter the website, you will see a list of published applications. Feel free to explore them!
For our purposes, the important part is the Submit Software button, which allows you to submit your application for inclusion in the repository.

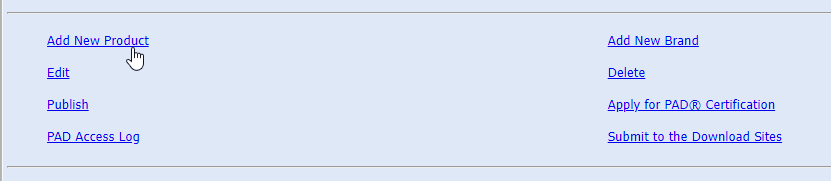
When you logged in then there will be some options to choose. We will choose Add New Product.
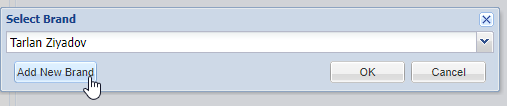
Then choose Add New Brand. In my option I already had created brand.
Fill in General and Contact Info.
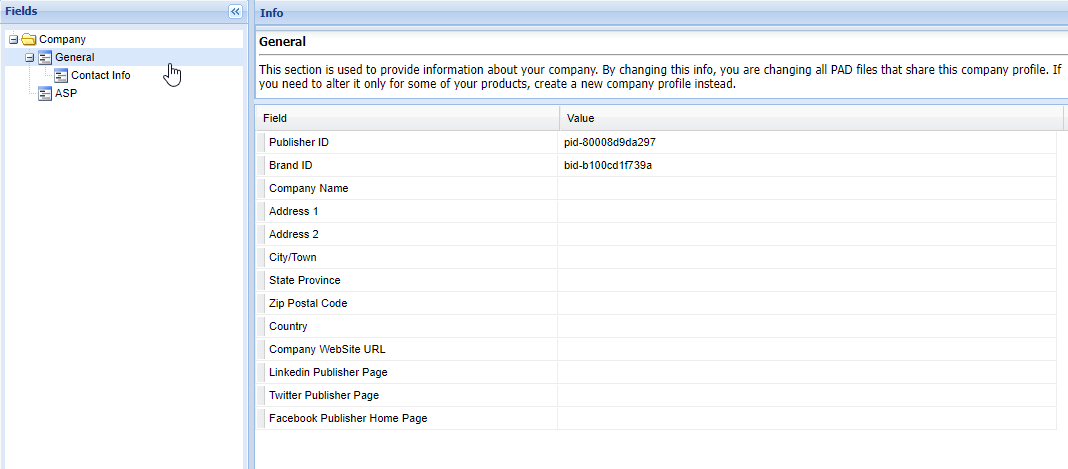
Save all when you done.
After on the start page, choose Add New Product again, but this time select your created brand. Then, you will need to fill in the following sections:
- Program Info
- File Info
- Program Description (Note: you can choose only one language)
- Application URLs
- Download URLs
- Site (Add your website if you have one, otherwise you can skip this)
Make sure to save everything once you’re done.
Appvisor will then start to Validate your PAD file. If something is missing or incorrect in your PAD, you will see errors in the console. Simply fix these issues and run Validate PAD again until everything passes.
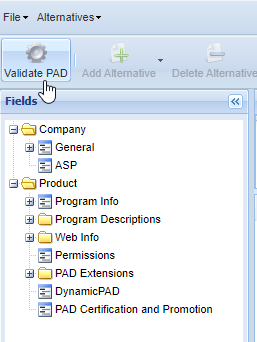
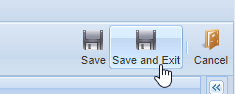
If everything is passing without error then Save and Exit.
It’s okay if you get some warnings (yellow-colored notifications) in the console. You can choose to add more information or skip them it’s up to you.
Last but not least, it’s time to publish. Choose the validated app from the list and click Publish.
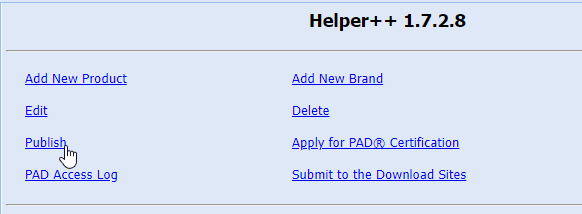
Congratulation you published your first application in the PAD repository.
What’s Next?
Now you need to wait until Appvisor confirms your PAD submission. You will receive a confirmation email from Appvisor once your app is approved.
After confirmation, your app will be available on various free websites worldwide. One example is:

Conclusion
There is an option to purchase additional promotion from Appvisor to share your app on more websites.
Thanks for reading.